Your Ultimate Guide to Successful Metal 3D Printing with Zortrax Solutions
Summary
- Zortrax offers the capability of metal 3D printing with metallic powder filaments on both industrial Zortrax Endureal and desktop Zortrax M300 Dual. In Zortrax Full Metal Packages, you will find all the essentials to start working with metals in an efficient and convenient way.
- While printing with metal-polymer filaments, it is essential to prepare the models properly for 3D printing in Z-SUITE as well as conduct a two-staged post-processing for the parts to become fully functional steel.
- Our engineers have made working with metals easier than ever through a series of Z-SUITE features, tailored to the specifics of metal 3D printing.
Metal 3D printing is an efficient manufacturing technology which involves using metal-polymer filaments to produce industrial-grade components. After proper post-processing, ‘green’ parts that come out of your printer become fully functional metal parts, which can be further processed just like regular steel.
Compared to traditional CNC machining or Metal Injection Molding, 3D printing with metal-polymer filaments ensures more design freedom. Moreover, the entry threshold into obtaining steel parts is much lower with additive manufacturing – the prices of CNC machining and injection molding remain in the range of tens of thousands euros. Zortrax offers a full set, containing everything one needs to start manufacturing metal parts, for less than 7 thousand euros. Look at the ALL3DP’s article for reference.
Recognizing these benefits, we have introduced metal printing capability for both industrial Zortrax Endureal and desktop M300 Dual 3D printers. The machines are compatible with two types of metallic powder filaments produced by the world’s leading manufacturer – BASF Forward AM: BASF Ultrafuse® 17-4 PH and BASF Ultrafuse® 316L. Along with high quality metal-polymer filaments, we offer all the other essentials to metal 3D printing within two comprehensive sets: Zortrax Full Metal Package 17-4 PH and Zortrax Full Metal Package 316L. Once you have a perfect metal 3D printing set, you probably seek advice on how to prepare your models for metal 3D printing most efficiently. You may also wonder what makes Zortrax solutions stand out from those offered by other 3D printers’ manufacturers. Read on to learn the technicalities which will make the whole process of working with metal easier than ever.
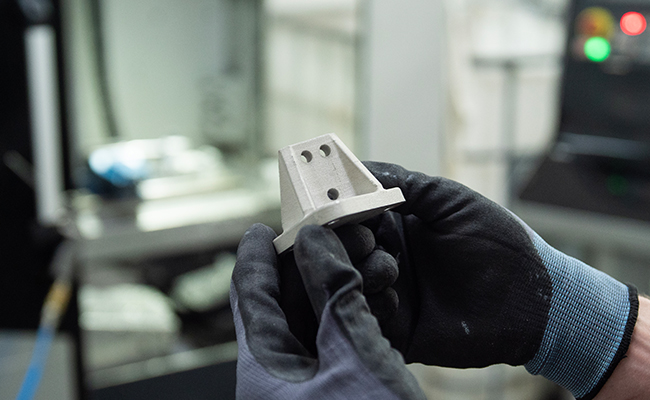
A metal 3D printed model after post-processing.
Why Metal 3D Printing Must Take Place on a Dual-Extrusion 3D Printer
When printing with metallic powder filaments, it is necessary to print a shrinking plate, which holds the entire model in place and ensures its correct position during post-processing. Using a shrinking plate prevents deformation of the model in the debinding and sintering processes. The main advantage of the support material we recommend, BASF Ultrafuse Support Layer, is that it is removed at the optimal time during post-processing, allowing the shrinking plate to be easily separated from the rest of the model after a post-processing stage.
The use of Support Layer ensures a much easier removal of support structures, particularly in the Zortrax ecosystem, where it is used to divide support structures consisting mostly of model material, that is metal. Z-SUITE software makes it possible to combine a metal support structure with layers of support material, thus dividing it into small pieces that can be easily removed together with the shrinking plate.
Watch the video to see how easy removing supports is with Zortrax solutions!
How to Use Zortrax 3D Printers to Obtain Quality Metal 3D Printed Models
Step 1: Preparing Metal Models in Z-SUITE
As in the case of all the other 3D printing filaments, manufacturing metal parts starts with preparing 3D models for printing in a Z-SUITE slicer. Regardless of the modeling software used, the 3D project, in order to be read by the slicing software, has to be saved in one of the following extensions: .stl, .obj, .dxf, .3mf, .ply. Then, you should align the part on the build volume in such a way that minimizes the need for support structures. We recommend using the automatic support option, as our engineers have worked on it and tested it extensively to guarantee that they are generated in a most efficient way.
The models 3D printed with metal-polymer filaments shrink by approximately 20% after the necessary post-processing, as the contents of the polymer filler are removed during the process. To guarantee the best results and compensate for the metallic powder material’s shrinkage, Z-SUITE has an Autoscaling option for metal models. If you have scaled the prints in the modeling stage, you can skip this step by selecting Disabled.
Step 2: 3D Printing with Metal-Polymer Filaments on Zortrax 3D Printers
Having prepared the model in Z-SUITE, you can proceed to 3D printing. The machine that you use hugely influences the print quality and your overall working experience. In order to decrease the risk of warping, it is essential that your 3D printer has an enclosed printing chamber with a low chamber airflow.
The extensive manual for working with Zortrax Full Metal Packages is available at our Support Center.
Depending on the type of Zortrax 3D printer you own, the steps of 3D printing with metal-polymer filaments may slightly vary. There are some ultimate guidelines that you need to follow, though, regardless of whether you work with a desktop or an industrial machine. Remember to calibrate the platform properly or use an auto-calibration option and always apply the Magigoo Pro Metal adhesive to make sure your metal 3D prints will stick to the platform well. Make sure that there are no metal particles in the printer’s chamber, paying special attention to the area around the heatbed cable socket, as metal remains may cause short circuit. In the case of working on a desktop 3D printer with metal capability, Zortrax M300 Dual, before any other activity, install all the components included in each Zortrax Full Metal Package.
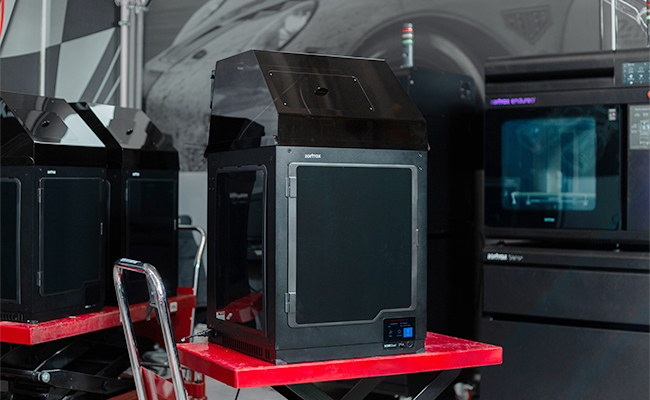
Zortrax 3D printers compatible with metallic powder filaments: M300 Dual and Endureal.
Step 3: Getting Your ‘Green Parts’ Post-Processed
Once the model has been 3D printed with a chosen metal-polymer filament, it is called a ‘green’ part, which needs to be post-processed to obtain the target properties declared for a given metal material by its manufacturer. To take advantage of professional post-processing, you just use the voucher to our trusted Partner’s, Elnik Systems, facility, where the models undergo two crucial steps: debinding and sintering. In the first stage, your parts are placed in a special furnace where the right temperature is applied to remove the polymer filler from the models. In result, the green part becomes the so-called brown part.
Then, the brown part turns into fully metal alloys with thermal processing. Here, the metallic powder left after removing the polymer filler turns into a solid structure of a metal alloy.
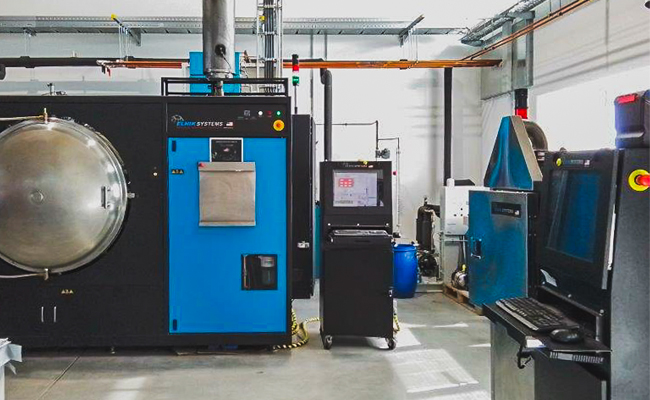
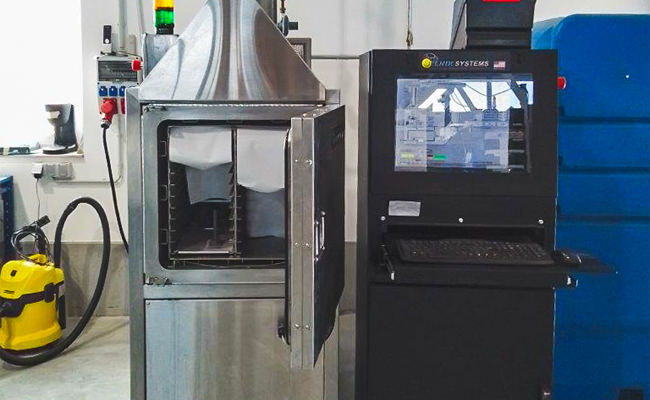
After the process, the models are cooled down, thoroughly packed, and sent to your doorstep. The items can now be welded, polished and further processed just like regular steel.
We have outlined the step-by-step instructions for working with BASF Ultrafuse® 17-4 PH and BASF Ultrafuse® 316L using both Zortrax M300 Dual and Zortrax Endureal in our previous articles, so check them out for more detailed instructions.
Z-SUITE 3.2.0 BETA: Slicing Software Packed with Metal 3D Printing-Facilitating Features
The latest update of Zortrax proprietary software, Z-SUITE in a BETA version 3.2.0, available to download at Zortrax Support Center, brings several major improvements in printing with metallic powder filaments. First, all support structures are here divided into smaller blocks and narrowed towards the bottom, which makes their removal, even from small crevices, much easier. It also significantly reduces the supports’ mark on the metal 3D printed models. Getting rid of supports now boils down merely to breaking off the unnecessary structures in your metal 3D printed models with no additional tools required.
Z-SUITE 3.2.0 introduces new gyroid Infill pattern, which allows you to 3D print metal models with infill of density range from 60 to 90%. This is particularly useful for cases where the part’s weight must be as low as possible (especially in such industries as space, aerospace, or automotive). Last, but not least, we’ve improved the way the shrinkage plate is printed. Therefore now, this element, which is essential for metal 3D printing, helps to counteract model deformation even better.
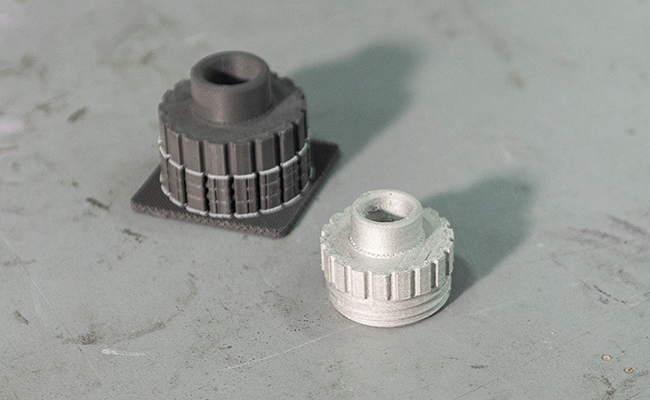
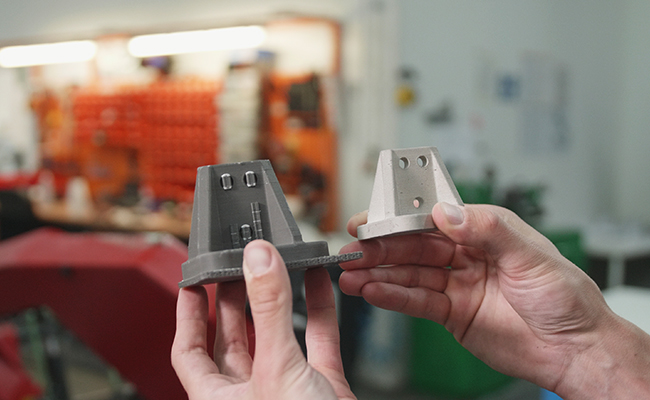
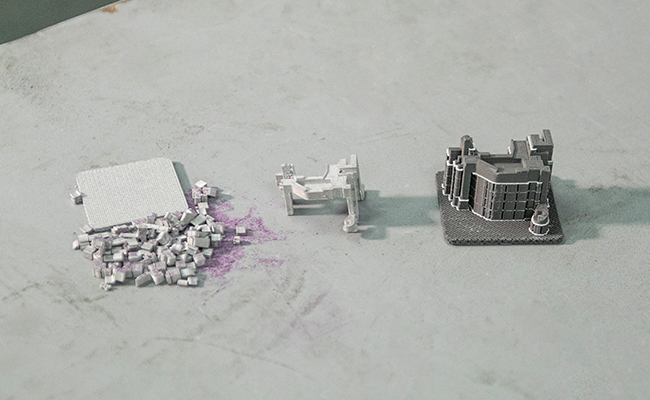

All these improvements translate into a convenient support removal and better-looking metal 3D printed components. What is worth underlining is that, although many companies offer metal printing capability, none has yet found a solution for how to efficiently remove supports from metal 3D prints. Except for Zortrax, that is.
Discover metal-compatible 3D printers: Zortrax Endureal and Zortrax M300 Dual.
Learn more about metal 3D printing and Zortrax Full Metal Packages, including all the essentials to metal 3D printing.