Utilizing 3D Printed Patterns in Molding. Modeling and Art Reconstruction
Art, as we all know, is something that brings us joy by offering a kind of aesthetic sensation. While it’s obviously true, such things as pleasure and joy cannot be said about, a bit excruciating, process of art renovating.
Let’s put it straight – it’s a problematic for many, even for professionals devoted to this kind of work as it consumes a huge amount of time and effort, not to mention your patience or nerves. That’s basically because you have to measure, create and fix all the missing bits and pieces and be extra concentrated and careful while doing this. However, we hope that after reading our article you will find out that the extremely useful technology od 3D printing is on your side and within your reach.
Technology-based Support
The main thing we put focus on here is 3D printing aka additive manufacturing or additive personal fabrication. No matter how you call it, together with 3D scanning it has a big role – boosting your overall performance by accelerating every stage of your work. What’s more, this technology has been already tested, here are two notable examples:
– Restoring a 800-year-old Buddhist goddess sculpture: with 3D printing and 3D scanning the engineers were able to create a scaled reference model, used during the restoration process (source)
– Stiching together a scultpure, smashed 3000 years ago: the Nuzi lion sculpture was fragmented into pieces, with a lot of pieces missing. While restoration of such an artifact might seem as an impossible task, it was actually possible thanks to a 3D printer. A team of Harvard engineers was able to 3D print some of the missing parts and complete the sculpture (source)
Reverse Engineering – Saving What Was Already Lost
It’s a technique also known as back engineering, applicable in cases where renovating damaged, often museum items or discontinued products is necessary and the feedback concerning the technical data describing the objects is not provided. This technique is mostly about reconstructing the missing parts by the use of a 3D scanner and a 3D printer, both of which should be extra precise, accurate and reliable. Just for the sake of optimum results.
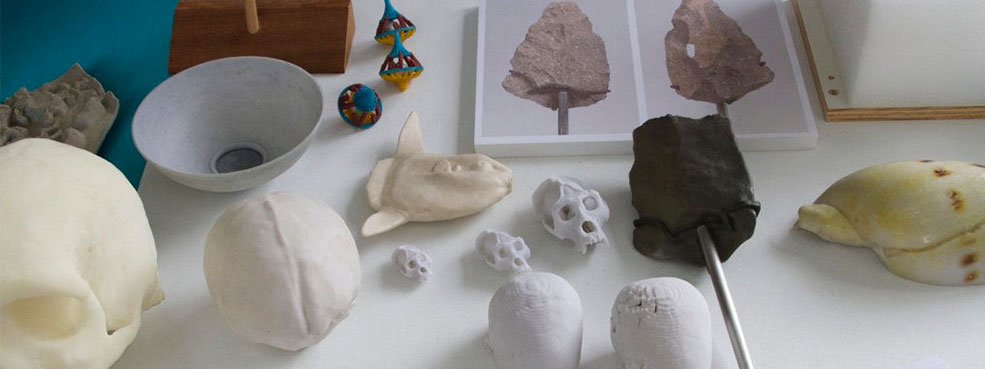
New Possibilities of 3D Scanning
A 3D scanner is a basic optoelectronic tool necessary for the process of reconstructing the missing parts of art objects, especially those without technical specification. The technology of this device is based on producing a laser beam over the object that we want to measure. Each time the laser line encounters a reflective surface, it reflects back to the device so multiple data points can be collected to create a 3D image in a form of e.g. .stl file. Just by using it instead of traditional measuring devices, you can be sure, that you have the most vital part of your work pretty much done.
One of the core benefits of a 3D scanner is the fact that together with 3D printing process the users are given almost rapid results, as the way from measuring the object to getting the tangible effects is impressively short. Especially those who want to obtain maximum precision and exact reflection of a given object will embrace the full potential of this device.
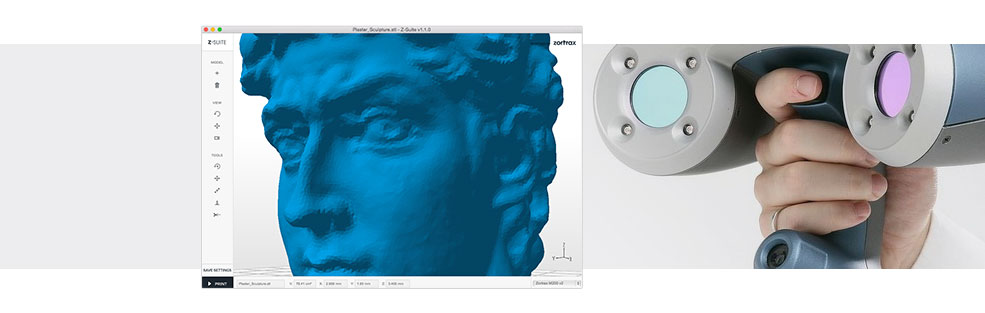
Printing preparation: Modifying and Slicing
The first features that can facilitate your work are to be found at the software stage, precisely in the moment when the data from the 3D scanner is transferred to the slicing program. The 3D scanner provides the exact coordinates of XYZ axes in a form of a set of points which is further converted into a polygon mesh and saved as .stl or .obj files.
Having this kind of digital model allows us to open it in most of CAD programs where the 2D structure of our element can be viewed. The next step before the printing process is exporting the file to slicing software like Z-Suite that converts our project into a set of commands that allows the 3D printer create the proper object (we call it the Z-Code).
Multiple Part Objects
Z-Suite slicing software gives users the ability to modify and edit the previously designed elements by changing their parameters. The program allows to slice and set the layer thickness that determines the final quality of a 3D printed pattern, its weight and printing time. By choosing various options available it is possible to set the printing process of several models simultaneously which may also contribute to cutting time and cost of the process.
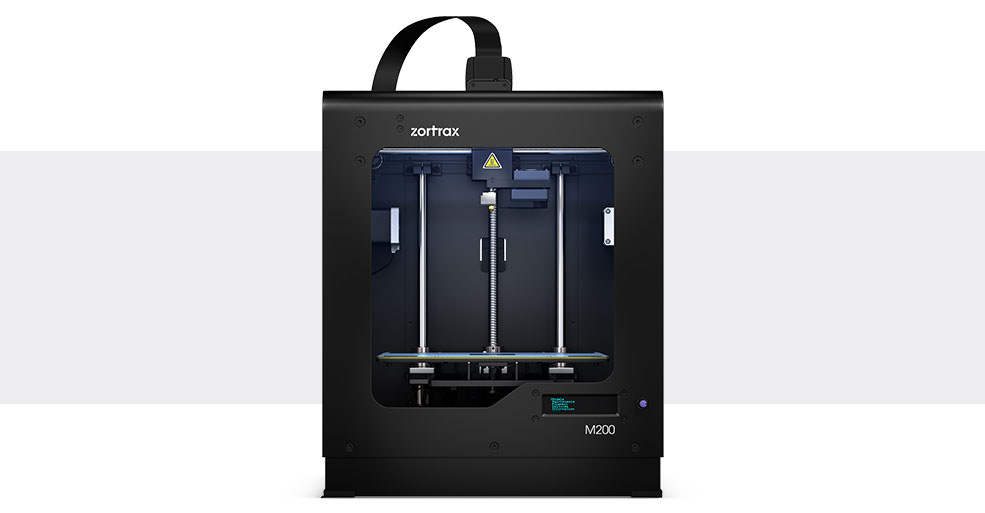
The models that consist of many different elements aren’t problematic as Zortrax M200 3D printer could print such objects with providing the proper accuracy of each detail.

Complex Geometry & Fine Detailed Shapes
That’s a problem commonly encountered by many engineers as average mold patterns may not be precise enough to replicate the objects. Especially those, that consist of various details or represent fancy, irregular shapes. This phenomenon may ocassionaly impose many boundaries and limit possibilities of molding, however, thanks to the use of 3D printing the exact copy can be cast much faster and give you some extra time to modify the 3D printed patterns or perform other necessary tasks.
The iteration process is at the same time much faster and cheaper, as you don’t have outsource your work and you can start producing models as fast as you want.
Precise, Defect-free Duplicates
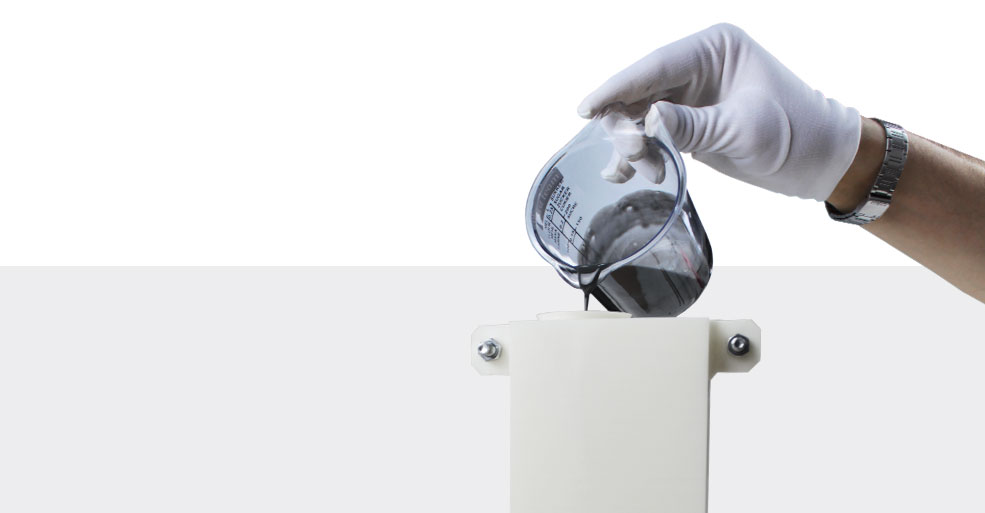
To obtain exact, defect free duplicates the main thing that should be taken into consideration is the quality of the surface. In 3D printed patterns this problem is reduced to a great extent as the texture of a finished element is mainly determined by the printer’s resolution and type of the printing material being used. The 3d printed object made of high quality materials should present a smoother and defect-free surface which, serving as a 3D printed pattern for casting molds, should reflect the original piece as closely as it is possible. There’s a method to improve the quality even further: the object could undergone various post-processing techniques that may help to end up with optimum results, as the ones presented above.
The forementioned methods on brushing up on the texture of the element are easy to conduct and don’t require complicated supply base or posessing any advanced skills. Using them to improve the final looks of the products creates some space for decision as choosing the appropriate method suitable to your needs and requirements imposed by the structure of the original part may obviously differ. What is more, each technique can be used separately according to the desired effect, or combined to produce more even and ultra polished 3D printed patterns.
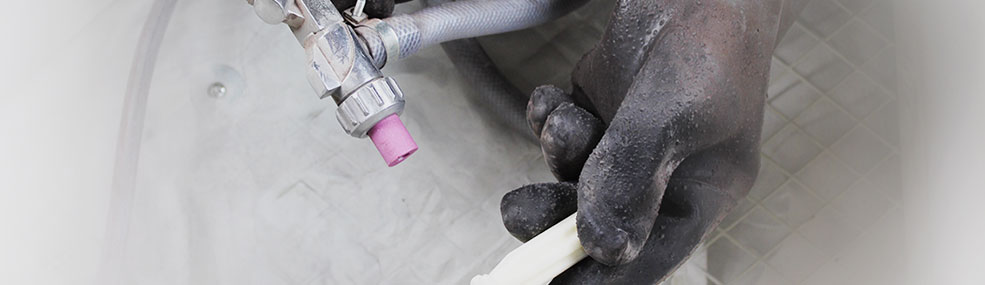
Improved Quality
Quality problems are an inseparable part of every molding process, encountered by tinkerers, as well as by engineers. Some of them might involve a real struggle to avoid, however, thanks to the techniques like sanding, sandblasting, glass beads blasting and acetone vaporizing the problem can be easily solved. The following techniques differ when it comes to their abrasive properties by offering light to very thorough polishing effect. The main purpose of them is similar and by incorporating these techniques and obtaining an even surface of a mold we, at the same time, facilitate better filling and adhesion of the injected substance. It’s mainly because the small imperfections and ridding lines are eliminated. Performing all these activities simply translates to the final quality of a cast.
Combined Techniques
It turns out that combining molding and 3D printing techniques may give even more to the stakeholders by offering them much freedom in choosing the material they use to make casts. They can use a variety of urethane resins, different types of rubbers, silicones or even waxes and clays. But the thing that should be stressed here is the adaptability of new technologies as 3D printing and scanning to the recent requirements of the present industry. It cannot be left without notice that by offering instant solutions to the performance and efficiency related problems the final effects can help get our business back on track or develop to the level that was unreachable by other means.
From Theory to Practice
Apart from the broad description and presenting the capabilities of additive manufacturing, we offer you an example in a form of a step-by-step tutorial where you can analyze how 3D printing can improve each stages of the molding process and influence cost and labor factors.