Building Detailed Furniture for Ball-Jointed Dolls with Resin 3D Printer
Summary
- Zortrax Inkspire UV LCD resin 3D printer is a tool supporting a creative process of building settings for macro photography depicting ball-jointed dolls.
- White Zortrax Resin BASIC is the material of choice for miniature dioramas because it can be easily sanded and painted.
- Castable resins can be used to build ball-jointed dolls in the manufacturing process used for jewelry-making.
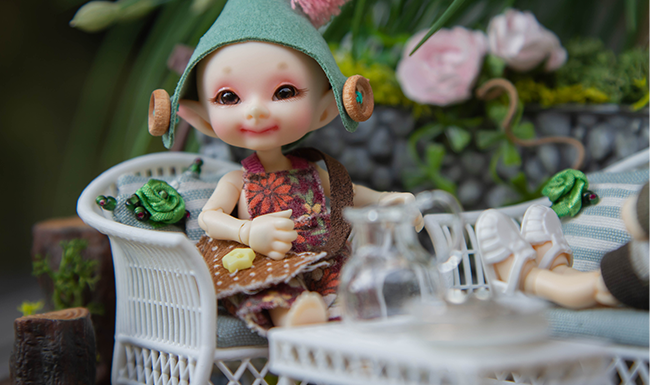
Ball-jointed dolls have become art pieces sought after by collectors all over the world. Originally introduced back in 1999 by a Japanese company called Volks, they attracted lots of attention coming from various communities active on Flickr or Instagram. Marta Bachorzewska, an architect based in Poland, started collecting her own ball-jointed dolls over a decade ago, and has since then become specialized in building scale models of furniture and various other items that create a setting in which the dolls are placed.
One of its Kind
What brought Bachorzewska to the world of ball-jointed dolls was their uniqueness. According to her, a collector ordering a doll has a profound impact on how the doll would look like. “For this reason, each of those dolls is unique, one of its kind and there is no other like that in the world. That’s what makes these dolls special”, explains Bachorzewska.
Intricately designed settings for ball-jointed dolls are a result of craftsmanship backed by resin 3D printing technology.
“Myself, I am a sort of a puppet master. I design little worlds for my dolls to live in. Each of them is different, so each needs her own setting, clothing, furniture and feel”, she adds. Moreover, all of her art is hand-made. When there are books on the shelf in a doll’s room, each of those books is made separately and has 50 printed pages made out of real paper. Such attention to detail ultimately translates into better art. But without a 3D printer, making such precise models was immensely time-consuming.
Designing Miniature Furniture
Bachorzewska starts her works with building digital models of furniture and other interior design elements. As an architect, she is proficient in CAD software, but tools made for architecture design are not always the best choice for art. “CAD relies partially on ready-made, predefined models, that can be personalized. Such customization usually works fine in architecture, but when it comes to details of interior design, the things you can modify are often limited to scale and material”, she says. That’s why she tried 3D Studio for some time and finally settled for using Blender.
Workflow Step 1: Digital Design
Furniture for ball-jointed dolls is designed in 3D modeling software. According to Bachorzewska:
- CAD software works well in engineering and architecture but can be limiting in interior design.
- For more artful designs, Bachorzewska suggests using 3D Studio or Blender.
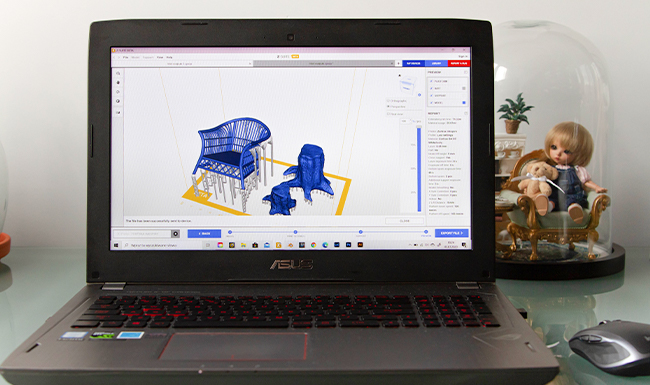
Digital models made in 3D modeling software are prepared for 3D printing in Z-SUITE.
Once the digital models are done, Bachorzewska moves on to the fabrication stage which relies heavily on resin 3D printing. She has been interested in additive manufacturing technology for quite some time. What prevented her from getting her own 3D printer, though, was the quality of prints. “When I photograph a doll, I usually use close-up macro photography. This way, every detail, and consequently, every imperfection, gets magnified and becomes clearly visible. With a standard 3D printer, I would have to spend lots of time on post-processing my models”, Bachorzewska says.
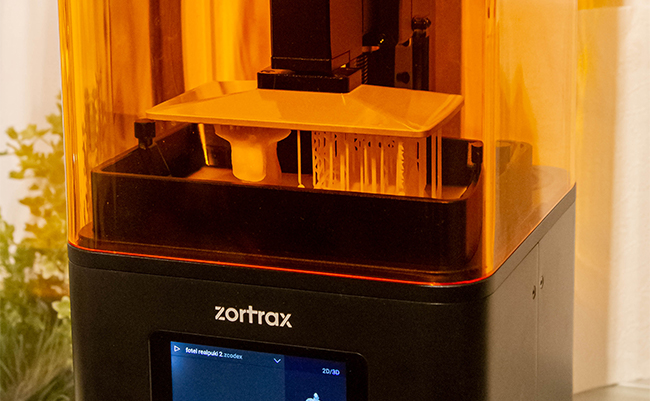
Zortrax Inkspire offers optimal precision and layer height for detailed miniature models.
But the Zortrax Inkspire she finally bought solved all those issues. According to her, the layer height and precision of prints turned out to be perfect for her projects.
Workflow Step 2: Resin 3D Printing
Resin 3D printers like Zortrax Inkspire guarantee optimal precision and layer height for fabricating detailed scale models. Bachorzewska points out that:
- A quality resin 3D printer like the Inkspire comes with extensive knowledge base and responsive support service which makes problem-solving faster.
- She chose white Zortrax Resin BASIC for her models because its properties allow using various post-processing techniques.

Making of a Diorama
The Inkspire is a really well made, high-end machine”, she says. Another reason behind going with Zortrax was responsive support service and an extensive knowledge base available on Zortrax websites in numerous guides and tutorials. This way, most of tech-related issues can be solved very quickly with readily available solutions. “You just need to get rid of rafts and supports and your work with the models is mostly done. The amount of necessary post-processing is minimal”, Bachorzewska claims.

Workflow Step 3: Cleaning and Supports Removal
Once the models are 3D printed, they are cleaned in Zortrax Ultrasonic Cleaner and undergo a quick support removal process. It’s worth remembering that:
- Z-SUITE, a slicing software that comes free with Zortrax Inkspire, has a lot of options for optimizing supports. The basics can be found here.
- While working with Z-SUITE and the Inkspire, it is possible to set additional UV exposure time specifically for support structures which makes them harder than the rest of the model and easier to remove.

A miniature armchair 3D printed on Zortrax Inkspire before supports removal.
Still, post-processing techniques usually can’t be dispensed with altogether, so another important thing was choosing a resin that could be post-processed hassle-free. “Dedicated Zortrax resins are really great. I usually use a standard white Zortrax Resin BASIC. The models can be easily sanded and painted”, claims Bachorzewska.
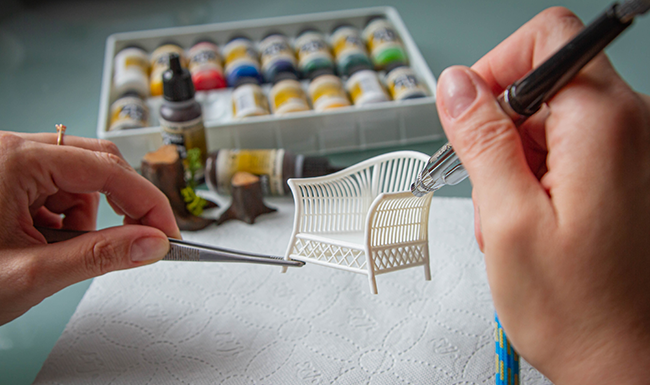
Workflow Step 4: Polishing and Painting
When the supports are removed, the models sometimes need polishing before they can be painted. Key takeaways here are:
- The majority of polishing is done on surfaces where support structures have been planted. This can be done with sand paper or a mini polishing tool shown in the picture above.
- Bachorzewska paints her models two or three times before lacquering, as shown in the picture below.

Marks left after removing support structures can be polished out prior to painting.
She typically prints her models in multiple parts and assembles them once the printing is done.“Points where different parts are joined have to be sanded to hide the joints.
Each piece of miniature furniture is covered with two or three layers of paint and lacquered.
Then, the model is painted with two or three layers of paint and lacquered. “The last step is adding unique details like upholstery in armchairs or sofas”, she says.
Workflow Step 5: Adding Custom-Made Details
In the last step, Bachorzewska adds finishing touches to her 3D printed furniture models to achieve a desired look and feel of the project. Those finishing touches can include:
- Making a hand-made upholstery for armchairs and sofas to make them look more natural in macro photography.
- Aging, usually achieved through meticulous painting, to achieve more life-like appearance.
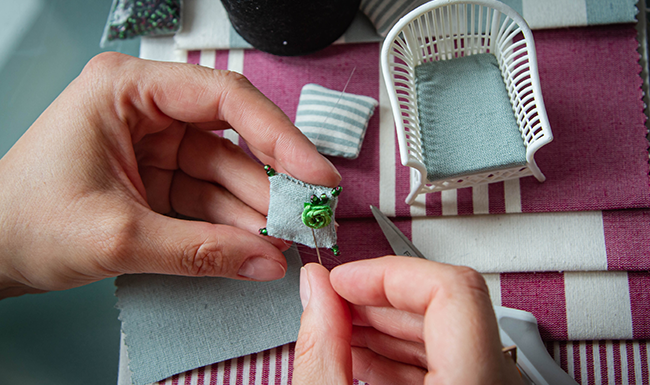
Once the post-processing is done, additional details like hand-made upholstery are added.
Now Bachorzewska wants to take her passion even further and Zortrax Inkspire is going to be an important tool in making this work. “I think about using castable resins to make ball-jointed dolls. I would make them the same way you make jewelry. That’s what next for me. Who knows, maybe I will become a jeweler one day”, she says.

When all the models are finished, the entire setting for a ball-jointed doll is composed to match a style desired by a collector.
According to her, her art is all about becoming a better version of herself. “I know it’s a pretty worn-out phrase, but it’s true. To do what I do you have to master a wide set of skills from design, to modeling, through rapid manufacturing, to photography” she says. “If someone told me 15 years ago, I’d be using 3D printers to make furniture for dolls I would just laugh”.