Zortrax 3D Printers Used for Manufacturing of BMW Car Parts
Summary
- 3D printing constitutes a useful tool in car restoration process, e.g. by giving the opportunity to manufacture elements of vehicles unavailable on the market.
- Krzysztof Urban, a Zortrax engineer, has restored an old BMW to factory condition using Zortrax M200 Plus desktop 3D printer and Zortrax Inkspire 2 resin 3D printer.
- He 3D printed such elements as trunk threshold caps, xenon connector caps, wheel bolt caps, and a custom smartphone holder using different 3D printing materials.
Relatively old aftermarket cars, with time, and subsequent wear and tear, often tend to gradually lose some of their unique details. Buttons get damaged, plugs get lost, and it happens that the mechanics sometimes forget that they were supposed to put a plug for the oil cap in the engine cover after their service or put a plug for a connector after repairing some wire. The missing or damaged parts cause the car’s uniqueness and style to slowly vanish, so the owners look for a way to restore its original look. While the crucial car components are quite easy to find on the market, the details are usually unavailable. This is when 3D printing comes into play, enabling recreation of any automotive item that is impossible to find commercially.
Here’s a story of how Krzysztof Urban, an engineer and Zortrax employee, used Zortrax 3D printers to restore his 2006 BMW e91 330d car.
Restoring a BMW with 3D Printing
The car has been in Krzysztof’s family for several years and has a lot of sentimental value to it, so he decided to take care of restoring it to nearly factory condition. The car was missing many details problematic to find on the aftermarket. These included trunk sill caps, xenon connector caps and a few other small elements which he manufactured on Zortrax Inkspire 2 resin 3D printer with BASF Ultracur3D® RG 1100B photopolymer. After a long struggle, the engineer managed to find the original oil drain plug cap in the cowl under the engine, but as a precautionary measure he also made one using Zortrax M200 Plus 3D printer and Z-PETG Black 3D printing filament. Apart from the caps, he also manufactured such elements as:
- A custom reinforced smartphone holder
- An aesthetic wheel bolt caps to improve the overall aesthetics of the 18″ rims in BBS BMW Motorsport 216 styling
Workflow step 1: Making CAD Models and Adjusting the Design
Krzysztof creates all his 3D models for the BMW car in Solidworks, trying to make replicas as close to the original items as possible. Many years of design experience means that he often finds it easiest to redraw a model just with a caliper at hand. “I am old-fashioned in this matter, and I have the most confidence in analog calipers with a dial indicator,” says Krzysztof Urban.
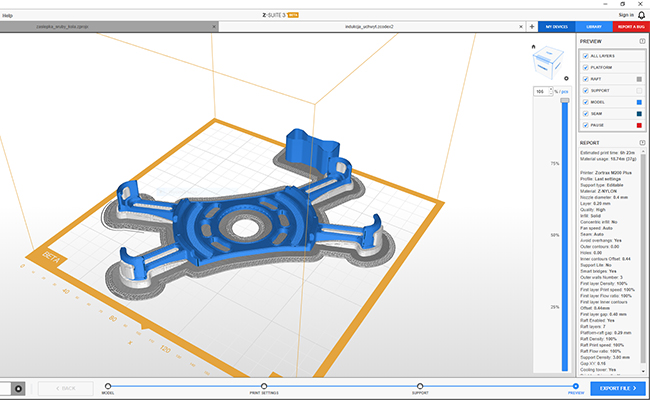
A custom phone holder 3D model prepared for 3D printing in Z-SUITE.
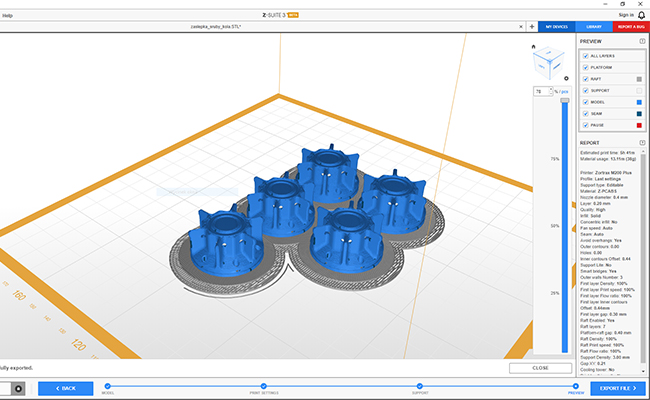
Wheel bolt caps models in Z-SUITE software.
Workflow step 2: 3D Printing the BMW Parts with Zortrax 3D Printers
Having designed the parts, Krzysztof moves on to the manufacturing process, using two Zortrax machines: Zortrax M200 Plus desktop 3D printer and Zortrax Inkspire 2 resin 3D printer. Z-SUITE slicing software settings and the choice of materials for each part were as follows:
- Wheel bolt caps: 3D printed on M200 Plus with the Speed Mode acceleration function, Z-PCABS 3D Printing Filament, 0.2mm layer, infill solid 100%
- Smartphone holder: 3D printed on M200 Plus with the Speed Mode acceleration function M200 Plus, Z-NYLON, 0.2mm layer, infill solid 100%
- Trunk threshold caps, Xenon connector caps: 3D printed on Zortrax Inkspire 2, BASF Ultracur3D® RG 1100B resin, layer: 0.05
“In automotive applications, I especially value Nylon for its resilience and low anisotropy. This low anisotropy means that it is relatively difficult to cause damage to such a component by delamination of successive layers. And its elasticity makes it ideal wherever there are any forces that lead to temporary deformation. Thanks to these characteristics, Nylon can withstand a great deal before any damage occurs,” Krzysztof underlines.
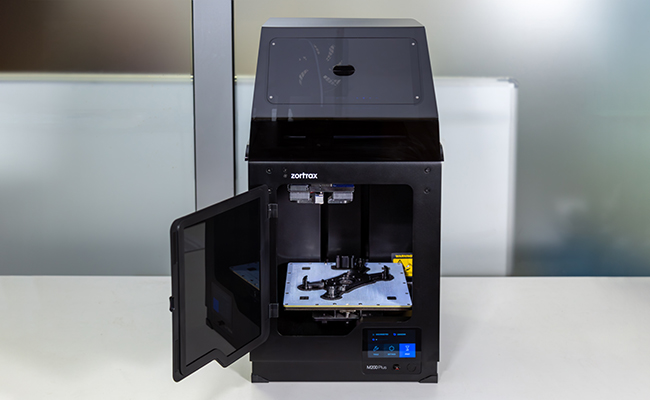


Zortrax M200 Plus desktop 3D printer used in the project.
A custom smartphone holder 3D printed on Zortrax M200 Plus.
3D printed wheel bolt caps.
Workflow step 3: Post-processing 3D Printed Car Components
Due to the high quality of both 3D printers and materials, the parts did not require much post-processing. The engineer just used a mini grinder to smooth the 3D prints only where necessary. He then painted the elements with black structural spray paint, choosing such techniques of applying the paint to achieve a structure like that of the factory elements.
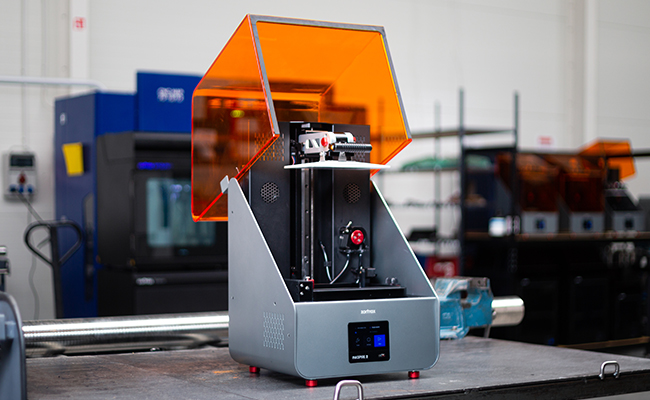


Zortrax Inkspire 2 resin 3D printer used in the project.
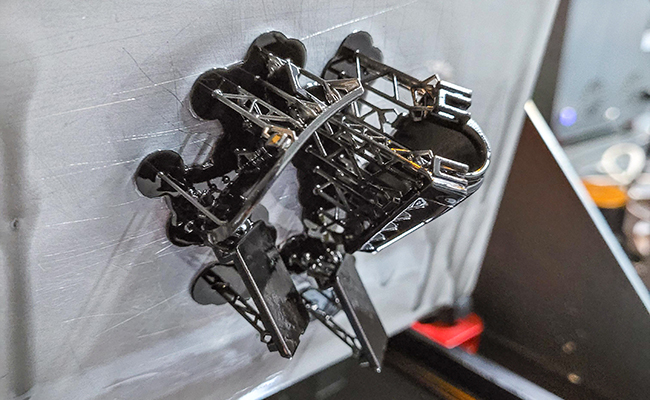
A xenon connector and trunk covers on Zortrax Inkspire 2 platform.
A xenon connector 3D printed on Zortrax Inkspire 2.
Trunk covers 3D printed on Zortrax Inkspire 2.
3D Printed Models: Best Custom Tools in Automotive
“I recently broke off the intercooler mount on my car by accident… If only I had had an access to my M200 Plus with Nylon at that moment, I’m sure I wouldn’t have had to improvise and would have done much better than what I came up with,” Krzysztof Urban says.
Having already dealt with numerous old cars, Zortrax engineer has no doubts that deficits of parts, especially interior details, are significant. A quality 3D printer and some CAD software at hand can solve a lot of problems in the automotive. “Sometimes you need to route a wiring harness aesthetically, modify some mount, and that’s just the tip of the iceberg. There are so many applications that it is impossible to list them all. We only truly learn how much we need a 3D printer when we do not have it at hand,” Krzysztof concludes.

A smartphone holder 3D printed on Zortrax M200 Plus installed in the BMW car.
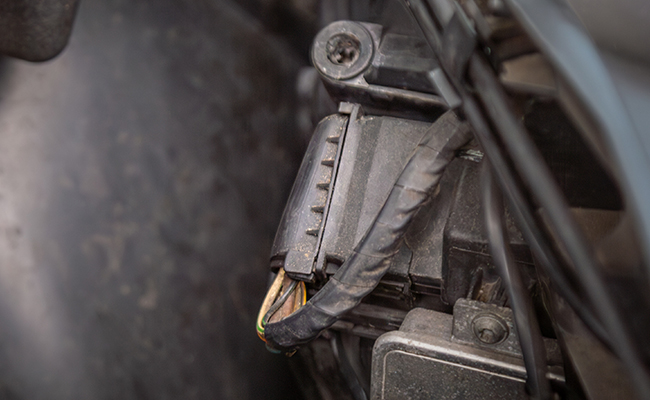
A xenon connector 3D printed on Zortrax Inkspire 2 mounted in the car.
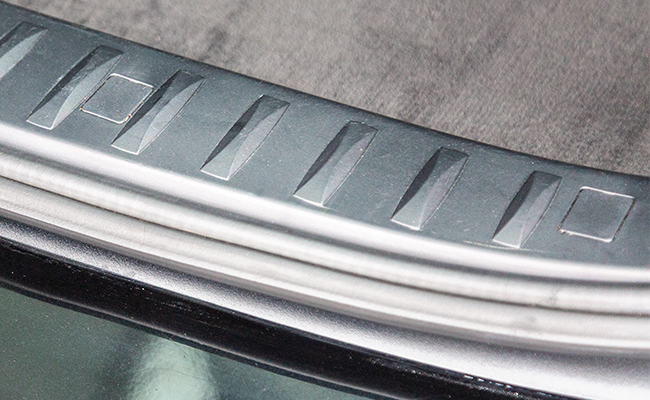
Trunk covers 3D printed on Zortrax Inkspire 2 installed on the trunk of the car.
If you would like to discover the capabilities of additive manufacturing, but you don’t have 3D printing experience, you can always use Zortrax 3D printing services. They’re offered by skilled Zortrax specialists like the hero of this case study, Krzysztof, to quarantee you will obtain high-quality custom-made parts right for your needs. For the automotive sector and any other as well.
Learn more about the 3D printers used in the project: Zortrax M200 Plus and Zortrax Inkspire 2.
Read more 3D printing stories on Zortrax blog.