Fallout’s Pip-Boy 3D Printed on Zortrax M200
Summary
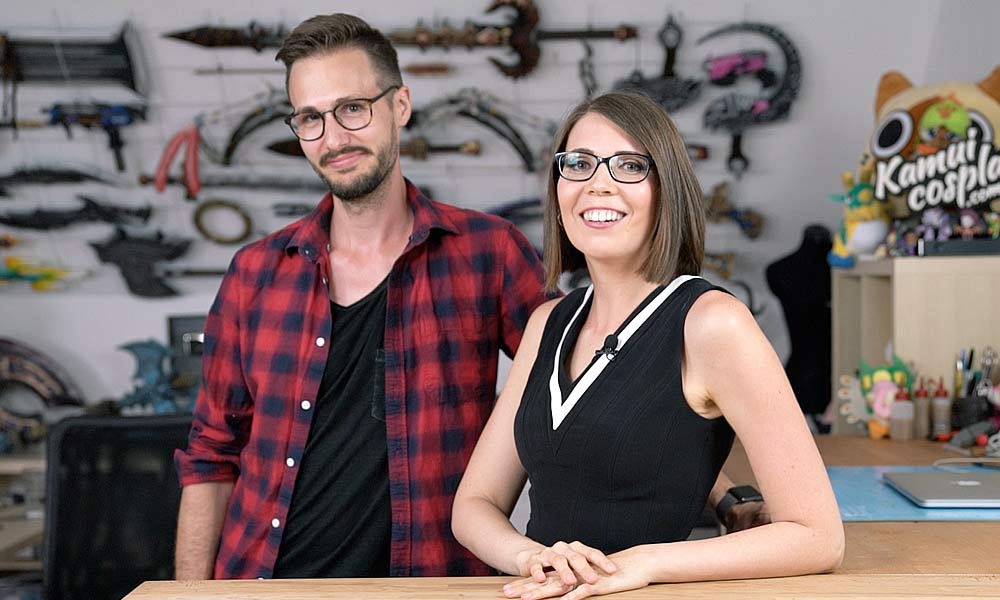
In 2003, Svetlana Quindt and Benni Schwarz, two cosplayers from Germany, started Kamui Cosplay, a company whose job is admired by millions of people around the world. They’ve worked on mesmerizing costumes and props for some of the biggest video game publishers and film production companies in the world, including Blizzard Entertainment, Electronic Arts, or Lucasfilm Ltd. Over the years, they’ve perfected their skills in reconstructing looks and objects from their favorite games, anime, and movies.
Professional Prop Making with 3D Printing
One of the manufacturing methods that helped the Kamui Cosplay team along the way is 3D printing. In fact, they think that there is enough space for more than that in cosplay. Svetlana and Benni successfully combine handcraft with 3D printing, and use both methods simultaneously. They see how they complement each other in costume and prop making: “While you can still build pretty much everything with traditional materials, there is a certain “charm“ to things looking perfectly clean. So 3D printing is very good for that. Also, I can still build other things by hand while my printer is working on something so it’s a win-win situation!” – notices Svetlana.

Svetlana Quindt and Benni Schwarz in their workshop. Photo: Courtesy of Kamui Cosplay.
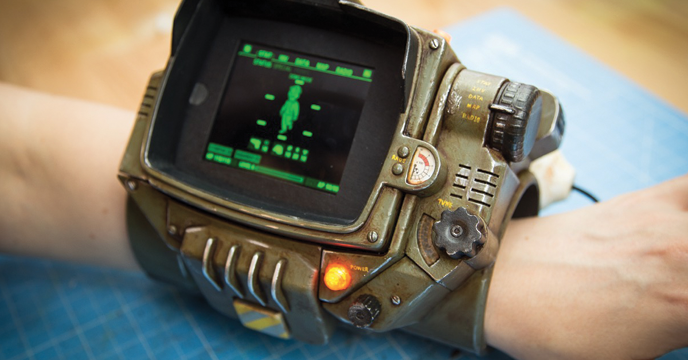
Svetlana is a huge fan and player of Fallout 4, an action role-playing game released in 2015. She enjoyed playing the game so much that she decided to recreate the armor of her in-game character together with the game’s most famous accessory – a Pip-Boy device. It is a personal computerized unit that is attached to the player’s wrist at the beginning of their story. The device allows the characters to access statistics, maps, data, and items, such as weapons.
Svetlana wanted to own a collector’s edition of the item, but it turned out it was too big for her wrist. That’s why, with the help from Benni and Benni’s brother, Jakob, she managed to create a custom 3D printed Pip-Boy to match her physique. For that purpose, they used Zortrax M200.

Pip-Boy device 3D printed and post-processed by Kamui Cosplay. Photo: Courtesy of Kamui Cosplay.
3D printing of the device’s casing didn’t seem difficult for the experienced cosplayers so they downloaded all the .stl files from ytec3d and began the work on almost 40 pieces out of Z-ABS filament.
Post-Processing to Reach Final Effects
With the ready models, there came the handcraft part of the project. The team started with clipping away supports and sanding each part with sandpaper to give them a less angular shape. Next, the team went on to preparing a special mixture they would use to glue all the parts together. It consisted of acetone and print leftovers. The acetone dissolved the pieces of prints, creating a slurry that gave a strong bond to the casing’s elements.
The Pip-Boy device required to have an old and weathered look, therefore, gluing was followed by a 4-step process. First, the team applied superglue onto the casing to create an imitation of rust. Next, the whole item was coated with a dark brown spray paint. Then, Svetlana and Benni added some green shading with spray paint. Some areas were painted black, yellow, or silver to resemble metal. Once the parts were dry, they were ready to be assembled into one piece with the use of glue and screws. As the next step, wiring for one white and two orange LEDs was soldered and connected to a battery inside the casing.
Finally, the team used a sepia-colored gouache paint and applied it generously with a brush. Before the paint dried, they had wiped the excess so that there was only a little bit of color left, creating an irregular effect of rust in the casing’s nooks and crannies. The rusty look was intensified with acrylic paints mixed with water. Such a mix was put over the areas with superglue so that it seemed that rust has grown naturally during the device’s use. The edges of the casing were covered with a silver paste to make these spots look chipped off.
Take a look at all post-processing procedures gathered in one video:
The Right Tool for the Job
As the Kamui Team points out, 3D printing really facilitated their work and helped them make professionally-looking costumes and props. The high quality of prints made with Zortrax M200 let them reduce the time needed for the whole project. Svetlana remarks that great printing results with dedicated filaments, such as Z-ABS or Z-GLASS, took their work to the next level: “I see it more as an awesome tool that will help me make things I would not be able to do otherwise. With 3D printing now I can create lightweight and durable parts in a matter of hours.”

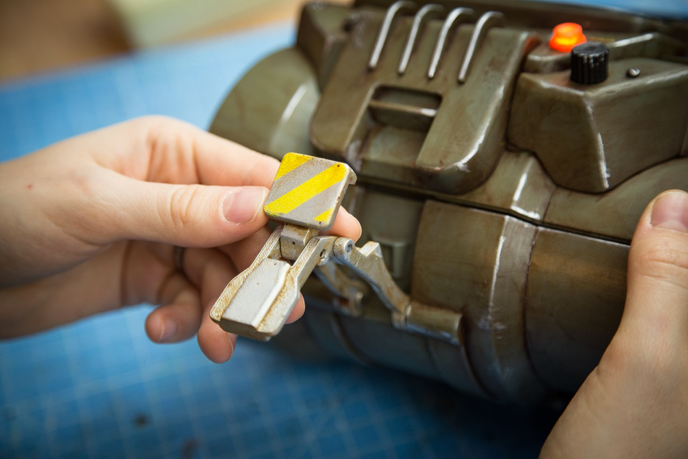
Metal-like snap-on mechanism in the Pip-Boy device’s design. Photo: Courtesy of Kamui Cosplay.
Saving time and having high-quality prints are not the only benefits Svetlana and Benni see in 3D printing. Being able to personalize their projects and make as many iterations as they need allowed them to translate their passion into a business. What’s more, they can rely on the equipment they’ve chosen for their workshop. For them, Zortrax M200 printer was easy to set up and utilize: “It’s great that the machine basically comes working out of the box so you only have to perform minimum of maintenance to have a smoothly working printer.”
Click here to read more about the Zortrax M200 Plus. It is a reliable desktop 3D printer based on the design of the M200 model presented in this article. Zortrax M200 Plus features Wi-Fi connectivity, a touchscreen, compatibility with glass plates, and many more.
Read more user stories on our website. Go to Zortrax blog for more articles.